
Want to extract checkbox information/status from PDF documents, images, scanned forms and more ? Check out Nanonets™ checkbox extractor for free & automate the export of checkbox information from any document!
Information extraction has been one of the prominent technologies developed in the past decade. The primary goal of these algorithms is to extract relevant information from unstructured data sources like scanned invoices, receipts, bills, etc., into structured data, using computer vision (CV), natural language processing (NLP), and deep learning (DL) techniques.
With the help of information extraction techniques, several businesses could automate different problems that include text, tables, forms, key-value pair extraction, and many more to save time and increase their efficiency. In this blog post, we will deep dive into extracting non-textual information, particularly on how we can detect checkboxes that are marked and unmarked from a given scanned document using Computer Vision and Deep Learning.
- What is Checkbox Detection
- Use-cases for Automating Checkbox Detection
- How to Extract Form Checkbox Information using Computer Vision
- Deep Learning Methods for Automatic Checkbox Detection
- Advanced OCR and Checkbox Detection Using Nanonets on Cloud
What is Checkbox Detection
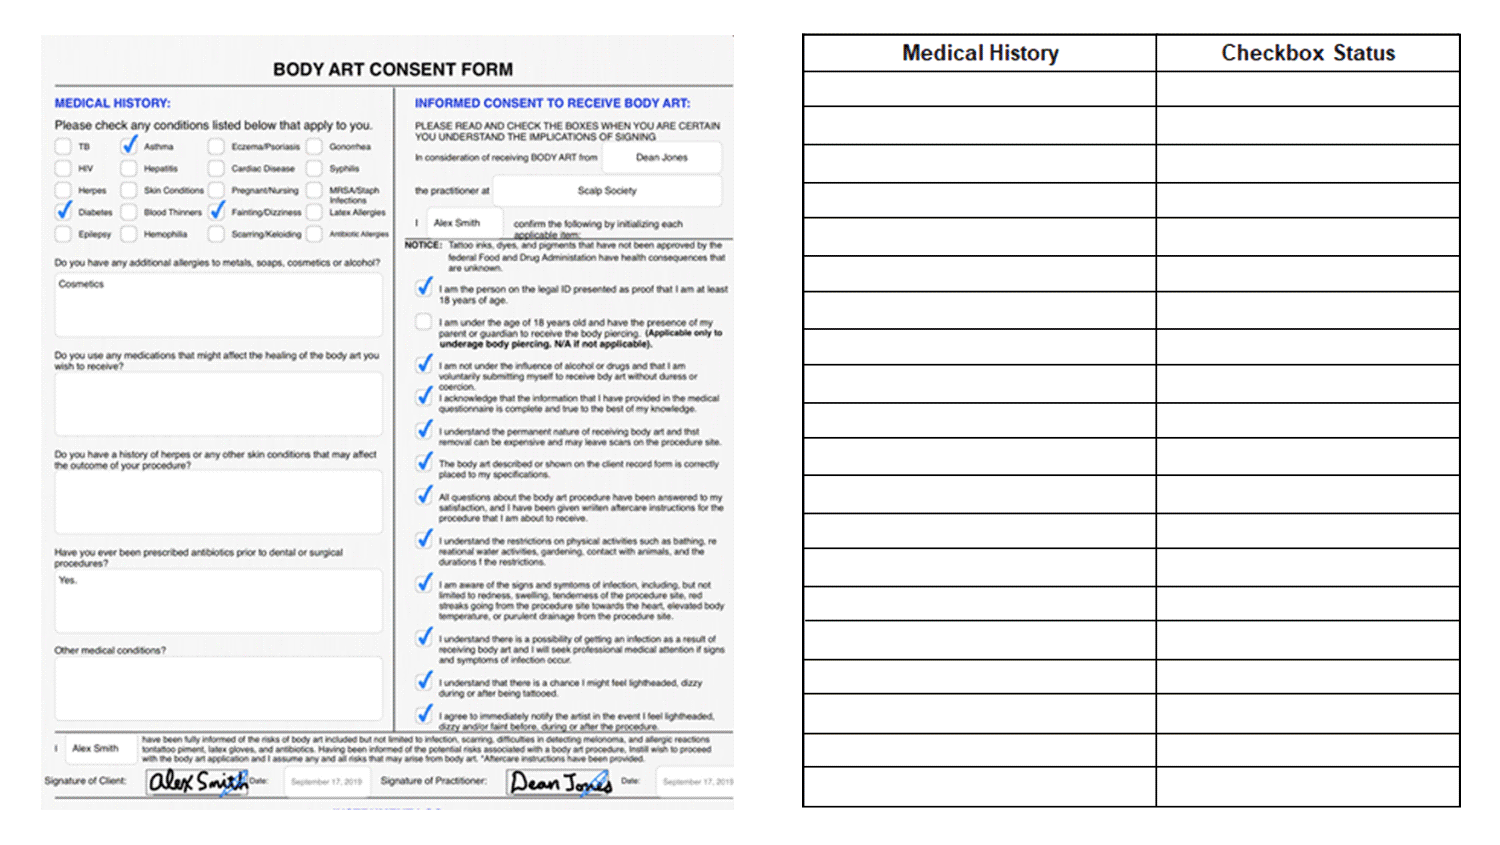
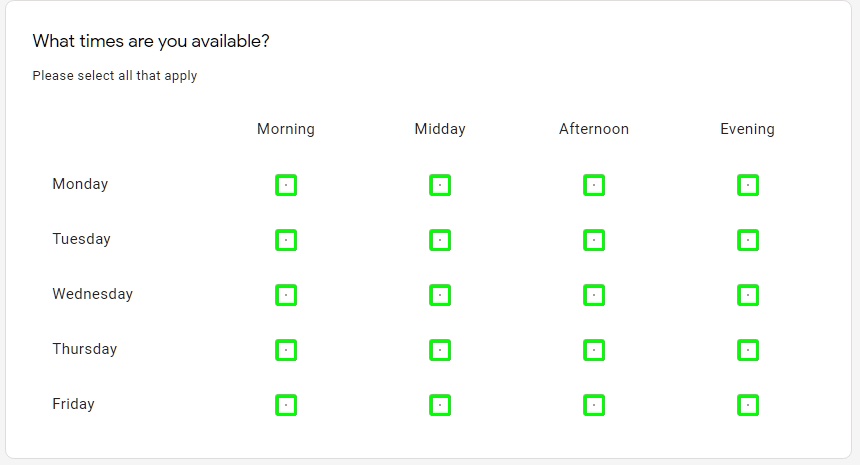
With the advent of OCR and Deep Learning, it’s easy to extract text from any given document. Thanks to open-source contributors and practitioners who have developed useful frameworks and languages to help solve this problem. However, there are still some situations where information is complicated, such as non-textual data like checkboxes, tables, labels, etc. For example, consider a scenario where our goal is to extract data from medical appointment documents that include a printed questionnaire filled in with some multiple-choice questions (i.e., it contains checkboxes with labels assigned to them).

It’s an uphill task to manually record the results of many questionnaires if there are high volumes of files. Therefore, to perform any analysis on this form or digitalize them, we first need to extract the data from the scanned document. This is where checkbox detection comes into the picture.
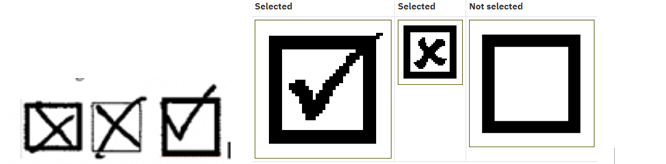
Checkbox detection is the task of detecting checkboxes and extracting their status (marked/unmarked) from a given document.
The next question that comes into our mind is how we could automate the checkbox detection process. As discussed, we will be primarily using computer vision to detect checkbox regions from scanned documents. This detection process includes various techniques, from detecting edges, horizontal and vertical lines to applying simple filters and contours. We will be discussing them in detail in the later sections of this post. Before that, let’s understand some use-cases where checkbox detection can be handy.
Want to extract checkbox information/status from PDF documents, images, scanned forms and more ? Check out Nanonets™ checkbox extractor for free & automate the export of checkbox information from any document!
Use-cases for Automating Checkbox Detection
Checkboxes are primarily seen in form-based documents when there are lists of options, and the person may select any number of choices. Usually, we see them in a group or as an independent checkbox for multiple or a single option input. Let’s look at some use-cases where detecting checkboxes can automate different tasks.

- Data Extraction from Surveys: To collect feedback and other valuable information, we usually conduct a survey. They are a critical source of data and offer insights for nearly everyone engaged in the information economy, from businesses and the media to government and academics. When these are collected online, it's easy to extract the checkbox status based on the user feedback. However, in most cases, surveys are contained in a non-digital format by using a paper form. In such cases, it's super hard to manually collect information and store them in a digital format. Therefore, relying on a checkbox detection algorithm can save time and also cut additional costs.
- Appointment or Registration Forms: We often see checkboxes on appointment and registration forms; for example, when we look at a doctor appointment form, we know a lot of checkboxes where patients need to mark symptoms manually. These forms are not digitally shared to save time; however, to store all this information and maintain the historical data of patients we could use information extraction algorithms. This is also less error-prone in contrast to manual entry. Additionally, we see such kinds of forms or documents while registering for some occasion or event.
- Cargo Declaration / Construction Materials: Infrastructure or construction-related businesses involve many documents related to cargo declaration and construction materials. These are only carried on physical forms because it is much handier at toll gates and to get signatures once they are shipped. However, these documents need to be digitalized before and after the delivery. This helps owners keep track of all the materials sent in the cargo, and these widely involve grouped checkboxes. This is where checkbox detection algorithms can save a considerable amount of time.
How to Extract Form Checkbox Information using Computer Vision
So far we have learned what checkbox detection is and have discussed some use-cases where it can be helpful. In this section, we will be practically approaching this problem using Computer Vision and detecting checkboxes in a scanned image. To follow along, make sure to install Python and OpenCV on your local machine. Alternatively, you can use an online Google Collab notebook.
Before we dive into the code, let’s first understand how to detect the checkbox from a given image. The basic approach is to detect horizontal, vertical lines and edges using contours and identify their position. Additionally, to sort these checkboxes, we should isolate all the noise, skew, and orientation issues. Keeping all these in mind should help us detect checkboxes accurately.
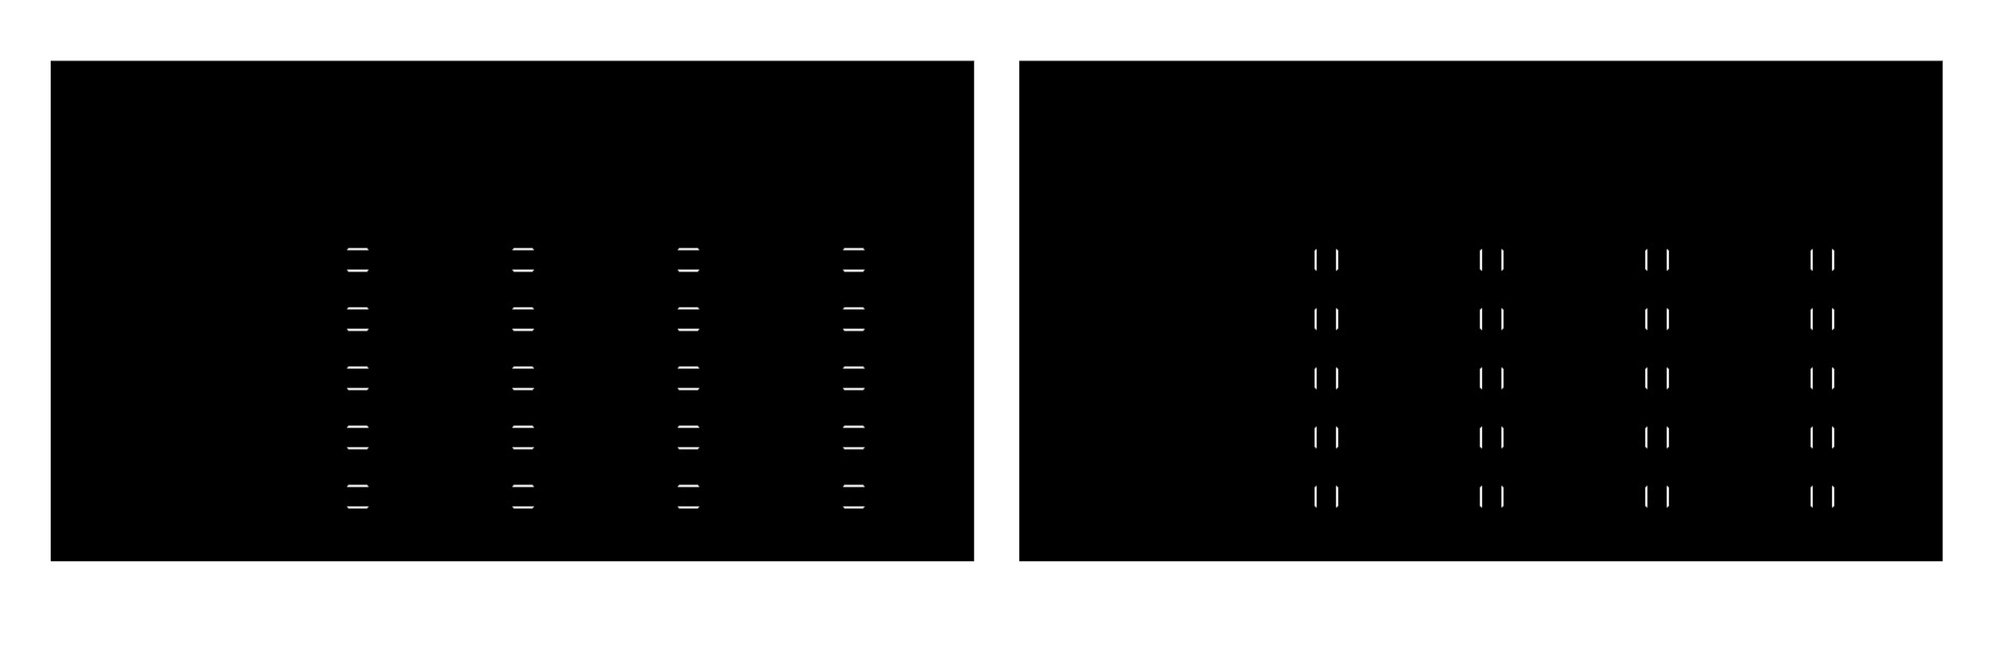
Now let’s dive into the code in simple steps. We will be using the sample form below:
Step One: Importing necessary libraries and reading the image
We will be using Computer Vision (opencv) for image transformation and NumPy (numpy) for manipulating the shapes of the array in order to read the checkboxes.
We will be using the imrea` function from opencv to load the image into an array. Following is the code snippet:
# install opencv and numpy
!pip3 install opencv-python numpy

# import libraries
import os
import cv2
import numpy as np

# read image into array
image_array = cv2.imread('image.png')

# check array type
type(image_array)

# output: numpy.ndarray
Step Two: Image binarization - Gray Scale
The image we are using might have lots of noise, skew, and unnecessary information. Let’s convert this 3-channel image (RGB- red, blue, green) into a 2-channel image (grayscale) to make our detection more accurate. This also helps reduce the noise and uneasy information but can also help increase the performance when working with large images. Additionally, we can apply the binary thresholding technique to reduce the complexity of the image / further increase the contrast of the image. This process is sometimes described as separating an image into foreground values (black) and background values (white).
# convering image to gray scale
gray_scale_image = cv2.cvtColor(image_array, cv2.COLOR_BGR2GRAY)

# image thresholding

_, img_bin = cv2.threshold(gray_scale_image, 0, 255, cv2.THRESH_BINARY | cv2.THRESH_OTSU)

img_bin = 255 - img_bin
After applying image thresholding, this is how the image looks, we can use the following snippet to view the image after thresholding.
from PIL import Image
from numpy import *

Image.fromarray(img_bin).show()
Step Three: Using morphological operations to identify edges
The thresholded image still contains some elements that are not needed, such as text and other noise which are not required. Therefore, let us identify the vertical and horizontal lines that make up checkboxes to sort these out. It can be achieved by performing morphological operations on the image. The idea is to initially extract vertical and horizontal components of the boxes separately by using special filters. Lastly, we will combine the horizontal and vertical lines to form squares and rectangles and identify checkboxes from the image.
# set min width to detect horizontal lines
line_min_width = 15

# kernel to detect horizontal lines
kernal_h = np.ones((1,line_min_width), np.uint8)

# kernel to detect vertical lines
kernal_v = np.ones((line_min_width,1), np.uint8)

# horizontal kernel on the image
img_bin_horizontal = cv2.morphologyEx(img_bin, cv2.MORPH_OPEN, kernal_h)

# verical kernel on the image
img_bin_v = cv2.morphologyEx(img_bin, cv2.MORPH_OPEN, kernal_v)


# combining the image

img_bin_final=img_bin_h|img_bin_v

Note: The morphological function (morphologyEx) needs two inputs, one is our original image, the second one is called a structuring element or kernel which decides the nature of the operation.
Step Four: Contours Filtering
In the last step, we simply note down the regions of detected bounding boxes (horizontal and vertical lines) and draw them on the original image array. To do this, we will be using the connectedComponentsWithStats from cv2. This will save all the contours into an array which we will be using to draw them on the original image. Follow the below code snippet:
_, labels, stats,_ = cv2.connectedComponentsWithStats(~img_bin_final, connectivity=8, ltype=cv2.CV_32S)

for x,y,w,h,area in stats[2:]:
    cv2.rectangle(image_array,(x,y),(x+w,y+h),(0,255,0),2)

Image.fromarray(image_array).show()
And just like that, we were able to detect all the checkboxes on a given image.
These are just simple steps to detect straightforward checkboxes in any given image, however, if we find complicated checkboxes, we might need to add additional operations and pre-process the image to achieve higher accuracies.
Want to extract checkbox information/status from PDF documents, images, scanned forms and more ? Check out Nanonets™ checkbox extractor for free & automate the export of checkbox information from any document!
Deep Learning Methods for Automatic Checkbox Detection
Over the years, Deep Learning algorithms have outperformed all the traditional machine learning techniques, particularly for information extraction algorithms. These algorithms are widely used across text-based data such as invoices, receipts, forms, documents, and many more. However, building these algorithms from scratch requires lots of experimentation and expertise. In this section, we will break down all the different steps involved in building a solid neural network architecture that can detect checkboxes and checkbox status.
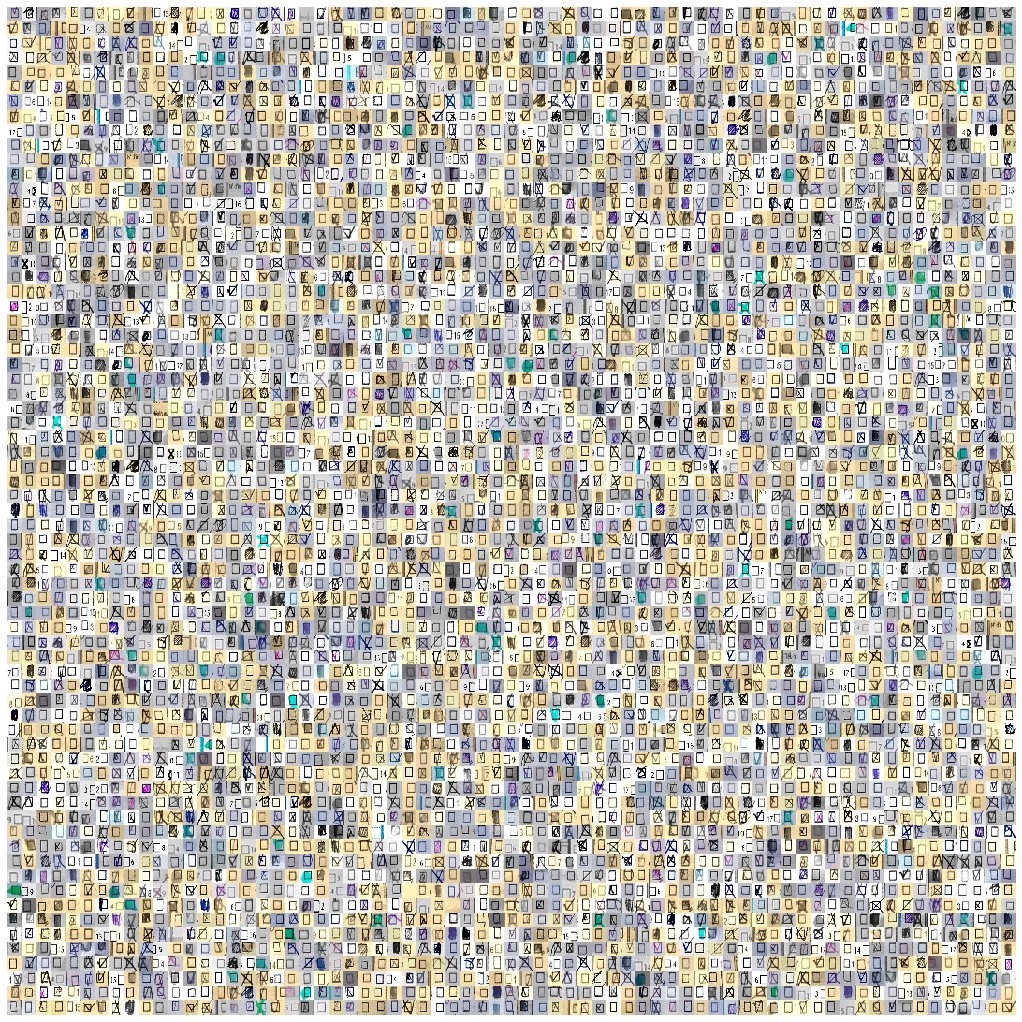
Dataset Collection / Preparation: The first and foremost step to build any deep learning-based model is to collect or prepare a dataset. The accuracy of the final model highly depends on the quality of the dataset. Therefore, robustness and consistency are crucial for a dataset to build a state of the art model. However, it’s hard to find public datasets to train from scratch for tasks like automatic checkbox detection. The easiest solution therefore to create one is to build one. For this, we need not annotate or scan images of marked and unmarked checkboxes. Instead, we can smartly crop checkboxes from scanned documents using Computer Vision and OCR techniques.
Following is the image showing how checkboxes are cropped and collected for building a deep learning model.
Dataset Loading: After the dataset is curated, the next step is to load the dataset into a data loader. This could be much easier if we are using modern python based frameworks like TensorFlow, PyTorch, or Keras as they offer various classes and methods for us to import them and use them out of the box. For deep learning models, we will need to send both the input images and their respective annotations. Here in our case, we can annotate marked checkboxes in one format and unmarked in a different format. As an example, here is how a sample annotation file looks like:
  {
      "templateID": "1",
      "templateName": "Document : Appointment letter",
      "templateCode": "TEMPLATE_ABCD",
      "checkbox_size": [-100, 60],
      "keywords": [
      {
        "keywordID": "1",
        "entity": "Cough",
        "code": "CHG",
        "keyword": "Primary Symptom",
        "pixels": [-75,-20]
       },
}
Here as we can see, the annotation contains information on checkbox size and its pixel size. These annotations can be made using different tools manually or by simply using a GUI based tool.
OCR and Deep Learning Model Training: This is the heart of the deep learning algorithm. Here we will be training a deep learning model (mostly with CNNs) to understand and extract all the necessary information from the checkboxes data. We need not build everything from scratch, and we could either use pre-trained deep learning models/weights or build one on top of it.
If you choose to utilize these models, we will need to fine-tune them and also update them based on our datasets. The other way is to utilize the pre-trained models and fine-tune them based on our data. For Information Extraction from text, in particular, BERT models are widely used.
Want to extract checkbox information/status from PDF documents, images, scanned forms and more ? Check out Nanonets™ checkbox extractor for free & automate the export of checkbox information from any document!
Advanced OCR and Checkbox detection using Nanonets
This section will look at how Nanonets can help us perform PDF document scanning and checkbox detection in a more customizable and easier way.
Nanonets™ is a cloud-based OCR as a Service Platform that can help alleviate some of the burdens that data entry places on your business. Many businesses are bogged down by the tedium that hand entering data constantly requires. With Nanonets you can build, train, and deploy machine learning algorithms automatically to do the work for you - allowing you to focus on working on more important things for your company.
One of the Highlights of Nanonets is the simplicity the service brings. There is no need for programming skills when using the technology, and the process of extracting data from a pdf and detecting checkboxes has never been easier! Check out this simple tutorial on how to train your checkbox detection algorithm on Nanonets:
Step 1
Go to nanonets.com and register/log in.

Step 2
After registration, go to the “Choose to get started” area, where all the pre-built extractors are made and click on the “Create your own” tab.

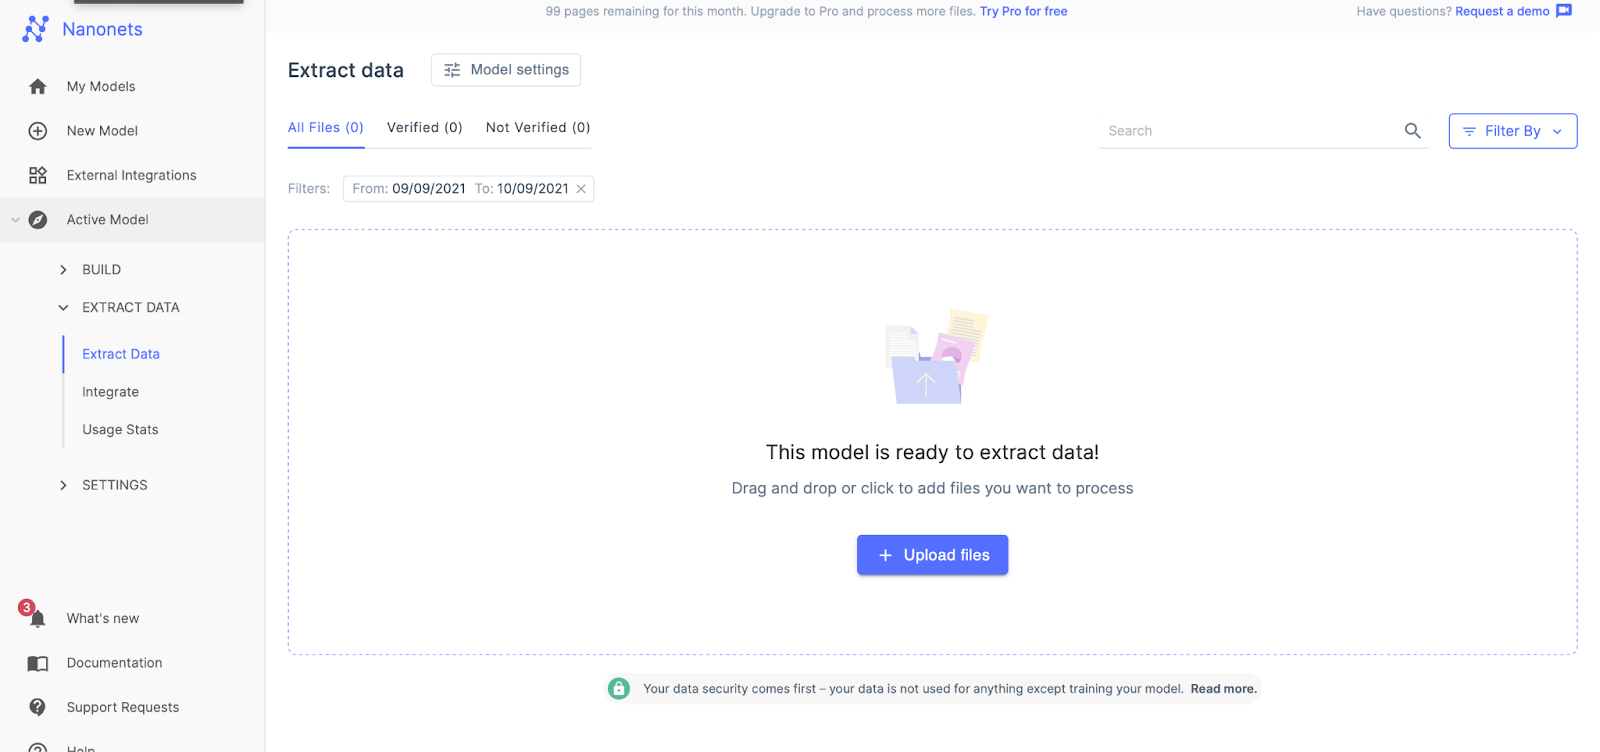
Step 3
After a few seconds, the extract data page will pop up saying it is ready. Upload the file for extraction.
Step 4
After processing, define the labels that you need to extract, for example, if we want to identify marked and unmarked checkboxes from a scanned document, add two labels, marked checkbox, un-marked checkbox and label them accordingly.
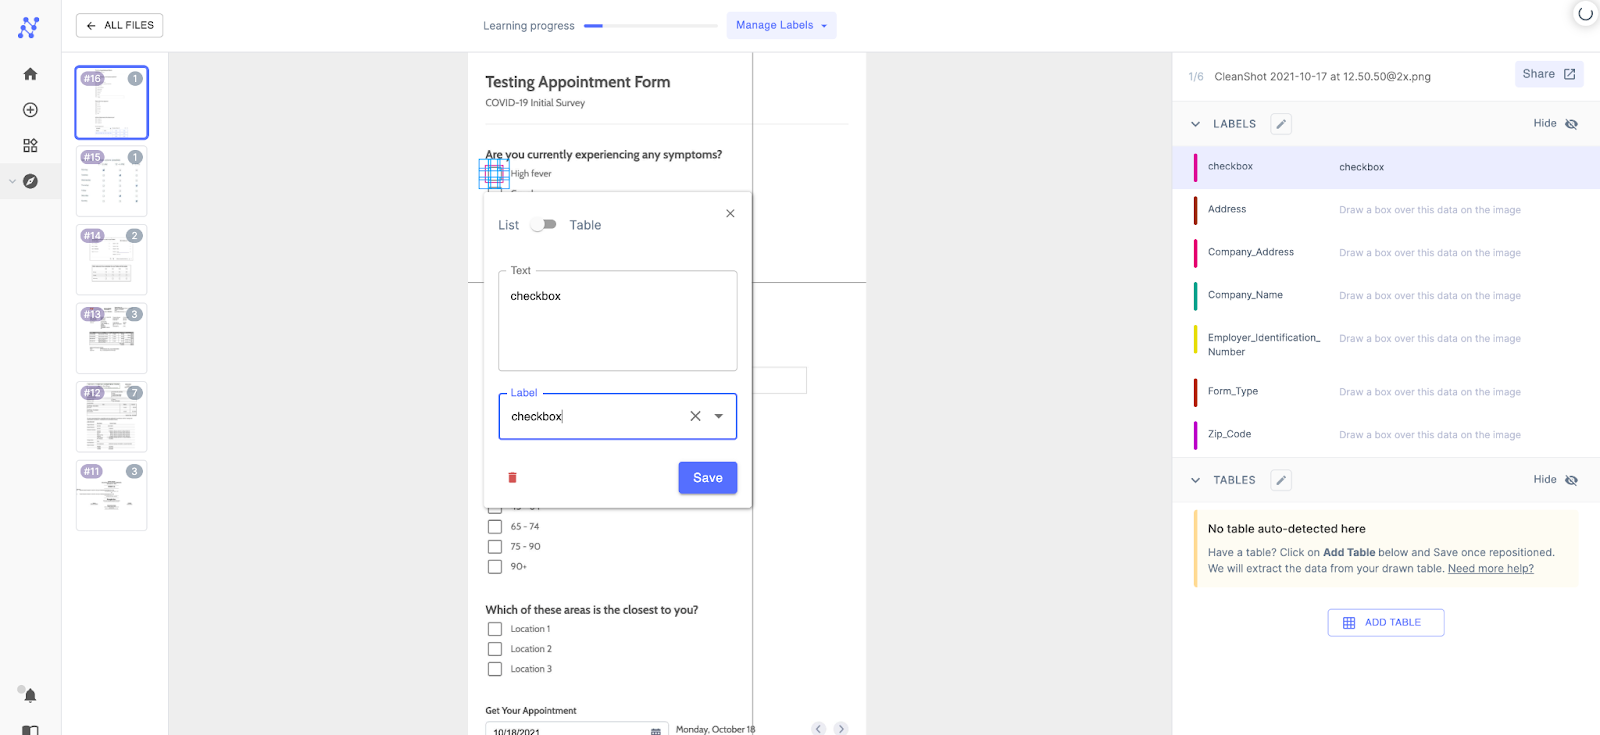
Step 5
Lastly, you can train the model by clicking on the Train button in the bottom right corner! And just like that, you have your checkbox detection algorithm ready to use in production. You can choose to export this model as an API on the 'Settings' tab.