This blog is a comprehensive overview of processing invoices using Blue Prism for AP automation.
Manually processing invoices is a huge drain on resources for businesses. AP teams spend a lot of time and money on a repetitive menial task that affects overall productivity and the organization's bottom line. Especially for organizations that handle large volumes of invoices over multinational business relationships, this can be a substantial impediment to growth.
AI-based invoice processing can help automate these tasks, ensuring accuracy, speed, and cost-savings at scale! In this regard, RPA (Robotic Process Automation) technology offers interesting opportunities to automate business workflows in an agile and cost-effective manner. An RPA integrated with a robust invoice OCR engine like Nanonets can provide the most optimal automated invoice processing solution to businesses today. Considered a market leader in the RPA space, Blue Prism is the go-to RPA tool preferred by organizations.
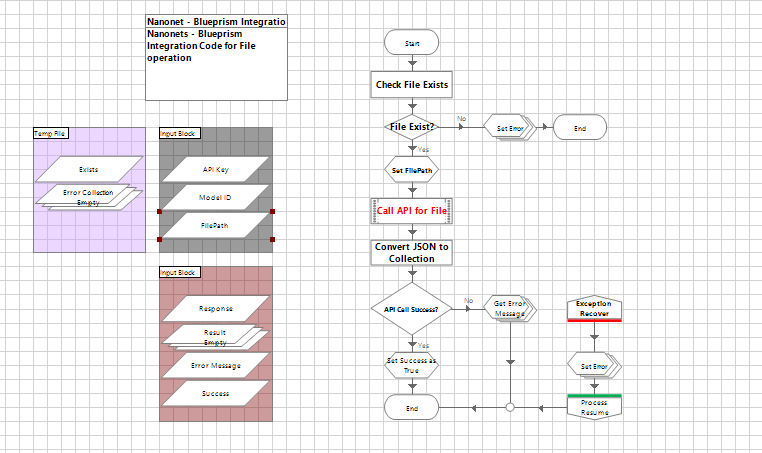
To integrate NanoNets with RPA we need to have basic knowledge of OCR RPA, and Machine learning at first, as there are different approaches and algorithms for different tasks at various points. Below is an image of the flow, how RPA(Blue Prism) works with Nanonets
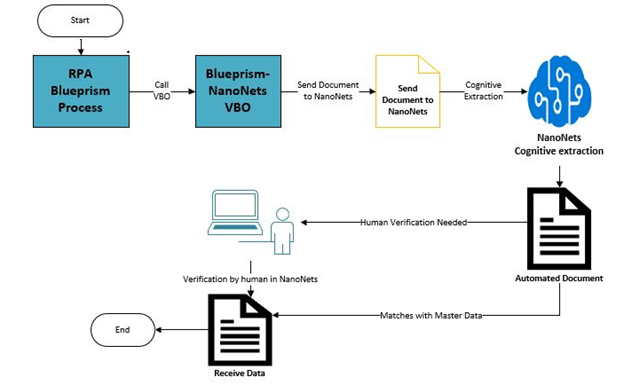
Now let’s review each of these below steps and learn how we can integrate Nanonets with Blue Prism.
There are two type of Blue Prism – NanoNets Integration we usually do.
-> Blue Prism – NanoNets Integration using File Input
-> Blue Prism – NanoNets Integration using web URL
The total Blue Prism – NanoNets Integration should follow two Steps. First is creating the Integration object and second is calling the created object from Process.
Blue Prism – NanoNets Integration using File Input
At first, we will go through the steps we need to follow for Blue Prism – NanoNets Integration using File Input
Step1: Creating Blue Prism – NanoNets Object
● Create a Blue Prism Object
Create a Blue Prism Object (BP – NanoNets Object) and create one action page(BP code for NanoNets File operation).
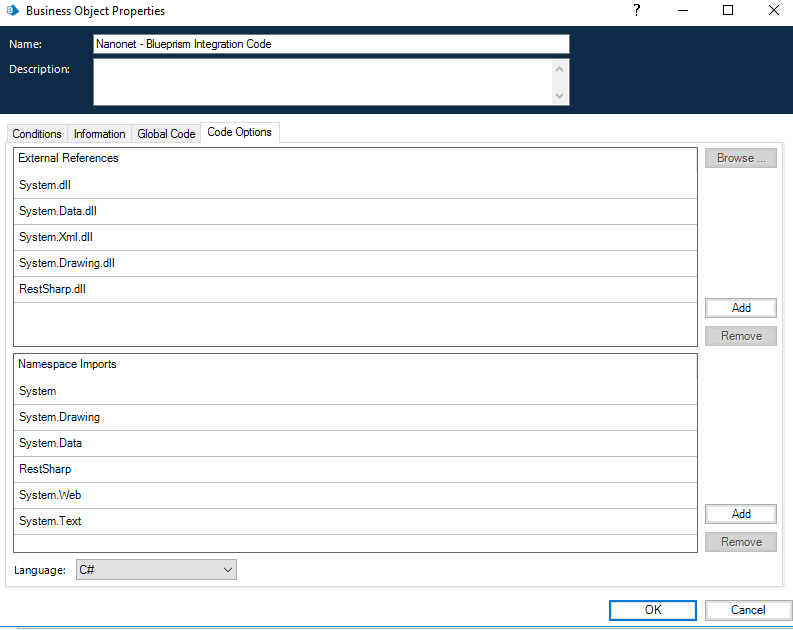
● Initialize namespace, Language and DL
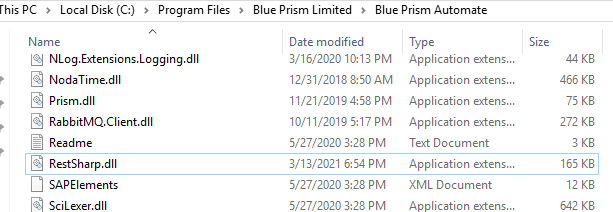
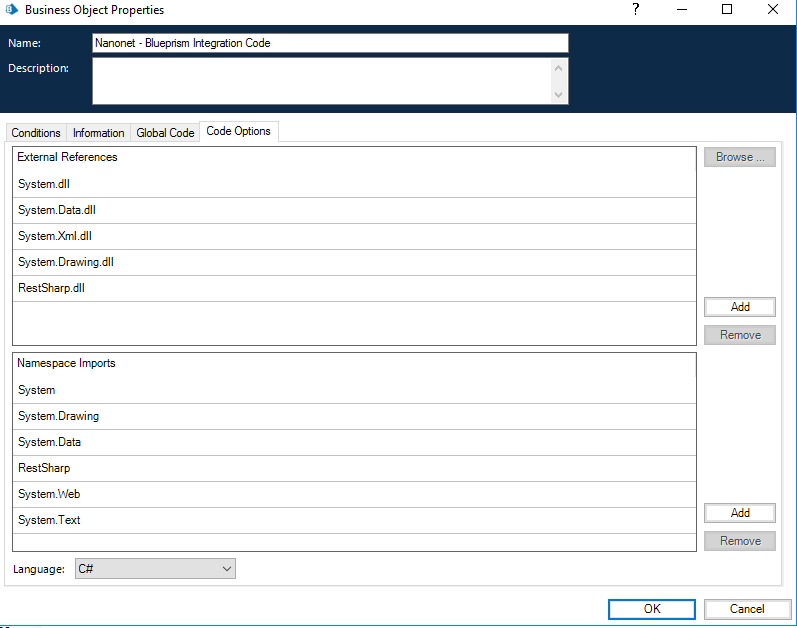
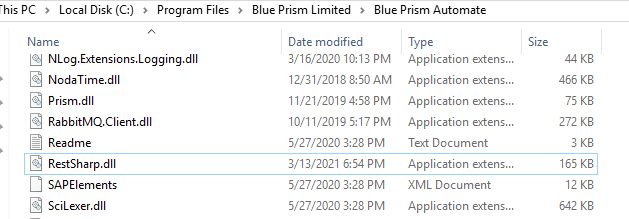
Go to Object Initialize Page, open Properties, go to code option. Make sure you have all the DLL and Namespace mention as in the below screenshot. IF any DLL file is missing add in as an external reference. If any namespace is missing do the same. Make sure you have all the default DLL and RestSharp DLL is present in bp folder, else download it from internet and place it in BP folder (C:\Program Files\Blue Prism Limited\Blue Prism Automate) .Select the language as “C#”.
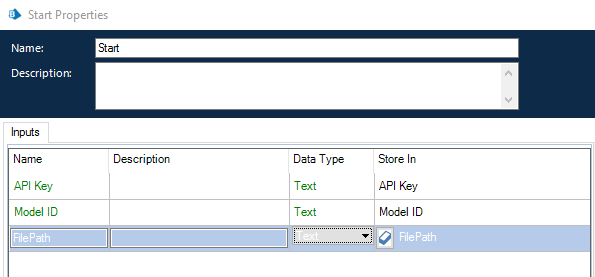
● Create Input Data Item in Start
Create three Data items with type Text.
⮚ API Key: To receive the NanoNets Account API key. Data type should be text.
⮚ Model ID: To receive NanoNets model ID. Data type should be text.
⮚ FilePath: To receive the file path for the input file. Data type should be text.
In the start stage create three inputs like below screenshot.
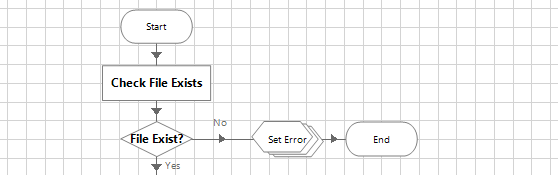
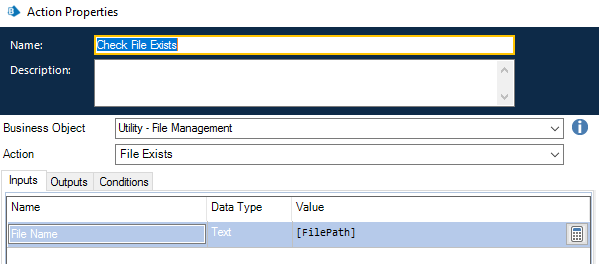
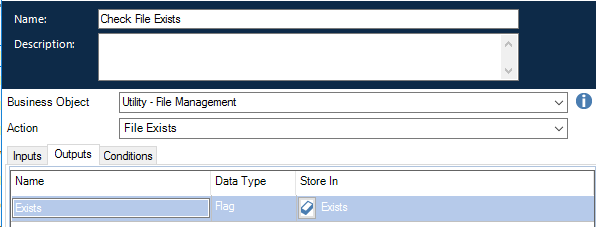
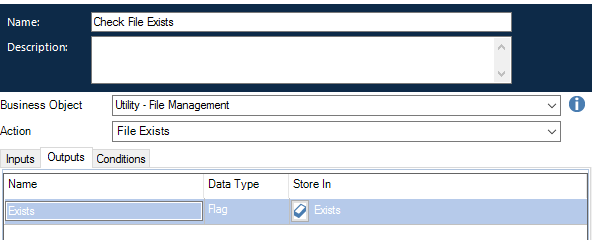
● Check for File Path Exist
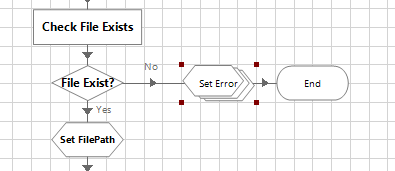
In the BP code for NanoNets File operation action first drag and drop one action. Call the Business object “Utility – File Management” , select Action as “File Exist”. In the input file Name value use “FilePath” data item. In output store the name “Exists” in a flag type data item “Exists”. After the Action stage add one decision stage to check the flag return from the action stage output if the file path exists or not.
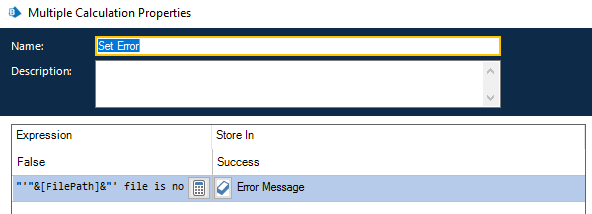
If not exists then add a multi calculation stage, set the error in Error Message data Item (type Text) and Set Flag data Item ‘Success’ as False. Connect the multi calculation with End Stage.
Check the below screenshots for details
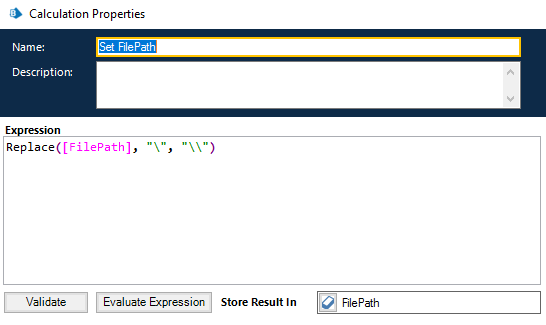
● Set File Path for the code stage
This is required to set the file path to use in code stage. C# usually takes single forward slash as escape character. Hence in file path single forward slash need to be replaced with double forward slash.
Create a calculation stage and use replace function to replace forward slash in FilePath data item value with double forward slash and put the output in File Path data item only. Refer the below screenshots.
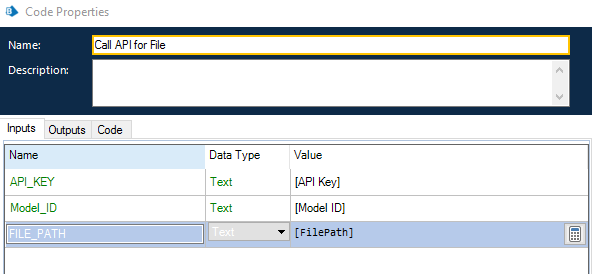
● Call the NanoNets API Code Stage
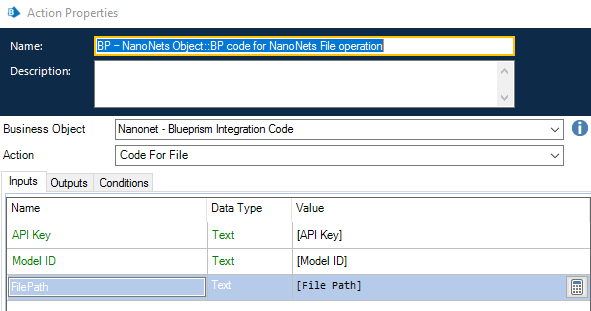
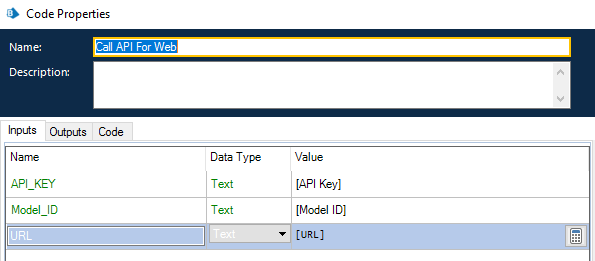
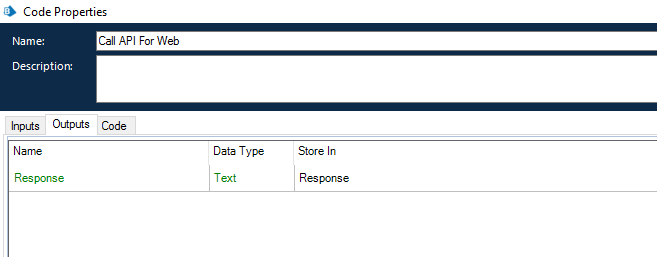
Drag and drop a code stage “Call API” and in input create three input API_Key, Model_ID, File_Path and assign the three value “API Key”, “Model ID” and “FilePath” which we have created before.
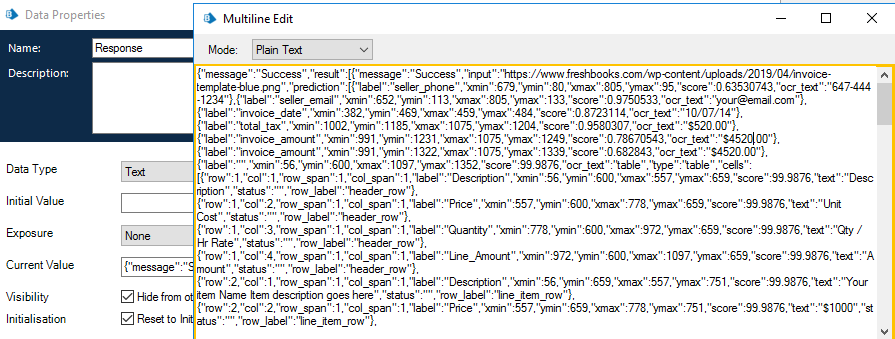
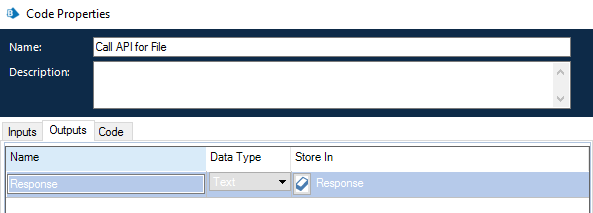
In the Output, code will return the response as in text format. Hence create an output with name “response” and store the output in a new data item “Response”. Data type for this item should be text.
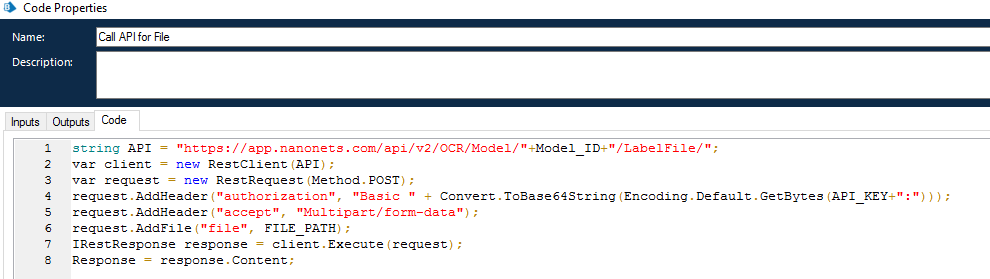
In Code stage write the below code as below or from screenshot
string API = "https://app.nanonets.com/api/v2/OCR/Model/"+Model_ID+"/LabelFile/";
var client = new RestClient(API);
var request = new RestRequest(Method.POST);
request.AddHeader("authorization", "Basic " + Convert.ToBase64String(Encoding.Default.GetBytes(API_KEY+":")));
request.AddHeader("accept", "Multipart/form-data");
request.AddFile("file", FILE_PATH);
IRestResponse response = client.Execute(request);
Response = response.Content;
● Convert the JSON response in Collection
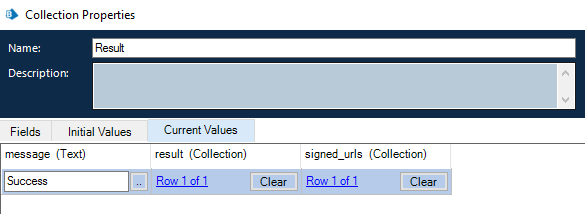
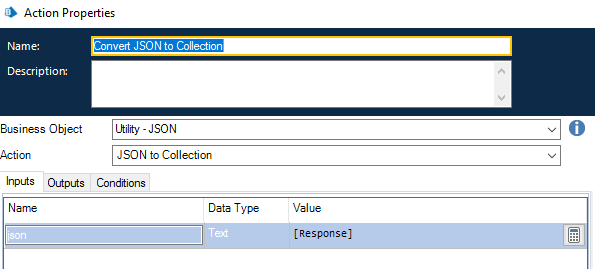
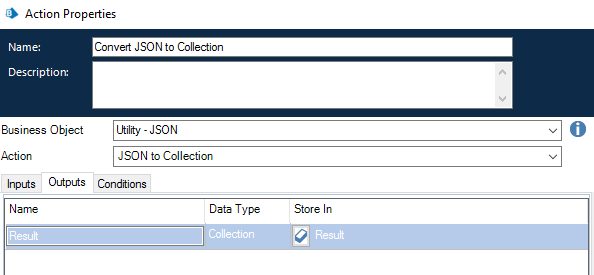
Once the API response the output in Response data item it needs to parse and convert the text output to Blue Prism data collection. Blue Prism provides a VBO “Utility – JSON” to convert the JSON to collection. Use an action stage and refer the business object in input to “Utility – JSON” VBO and call the action JSON to Collection. Provide the API response as input in input tab and store the output in Result collection in output tab.
If you don’t find the Utility – JSON VBO, import it from VBO folder (C:\Program Files\Blue Prism Limited\Blue Prism Automate\VBO).
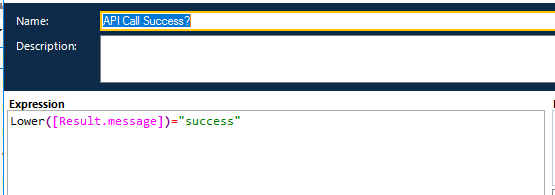
● Check API Success
Once the response in collection is populated it needs to be checked if the response is correct or there is error in API call. To check this, add one decision stage if message field in result collection is success or not. Check the below screenshot.
If Success, add one calculation stage and set the “Success” flag as True. Connect the calculation stage with End.
If Failure, add one multi calculation stage and set the “Success” flag as False. Failure reason will be under Result collection ->Error-> JSON:Array->Reason. Create a collection “Error collection” and get the errors from Result Collection and get the error message in “Error Message” text data Item
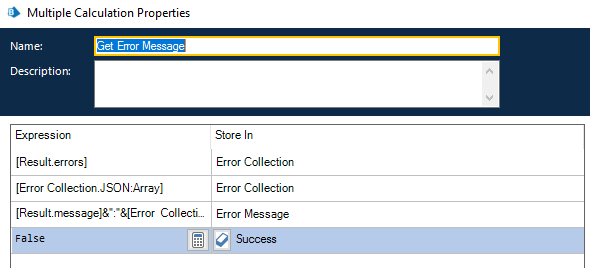
Connect the multi calculation stage with End stage.
● Error Recovery
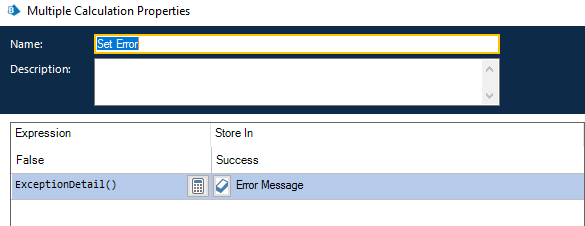
If any uncertain exception comes as runtime in that case add one recover and resume stage. Add one multi calculation stage(Set Exception) to store the exception.
Set the Success flag as False and use ExceptionDetail() function to get the exact error and store in Error Message data item. Connect Recover stage ->multi calculation stage -> resume stage - >End stage.
Your Total Code should be like the below screenshot.
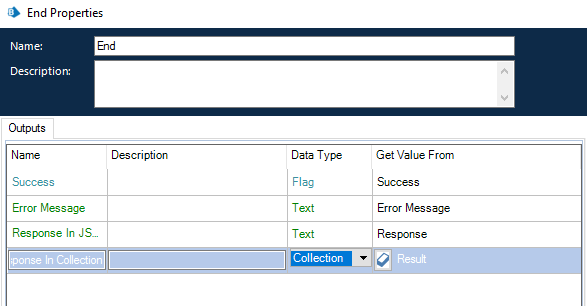
● Set up END Stage
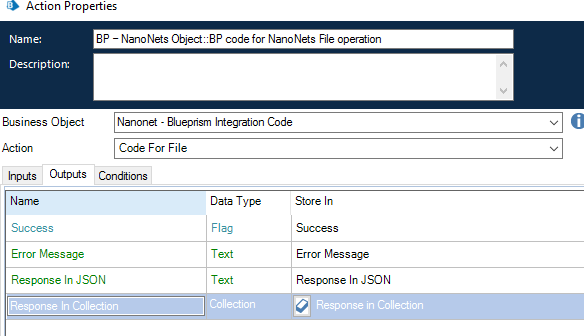
Pass the below four data items from end stage to get it in calling process.
⮚ Success: To check if API calling is success or fail.
⮚ Error Message: To Get the Exact Error message if failure.
⮚ Response: To get the API response in text format.
⮚ Result: To get the API response in collection format.
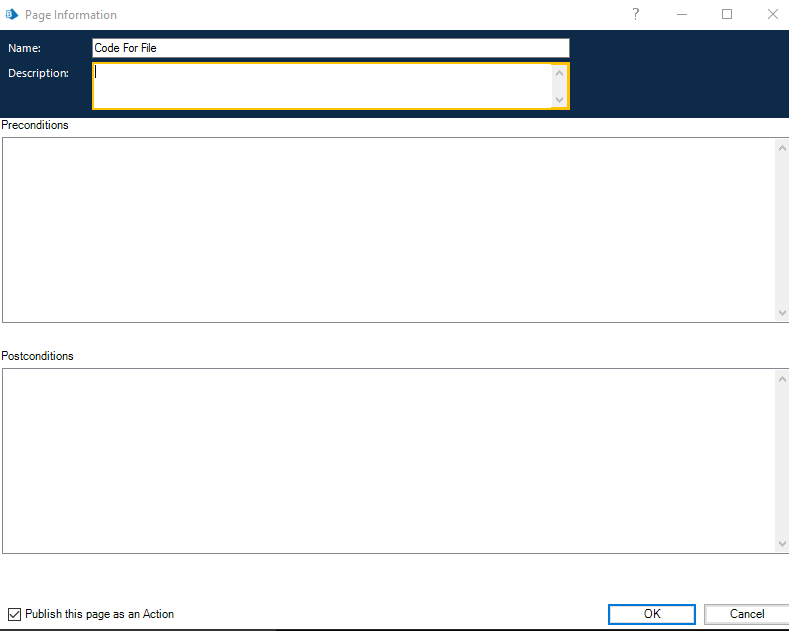
● Publish the object
Publish the object action from Action Page Information and save the Object.
Step2: Call BP – NanoNets Objects from Process
● Create a calling Process
Create a new process (BP - Nanonets Process) from process studio and rename the main page as “BP - Nanonets Process File Operation”
● Call the API Object
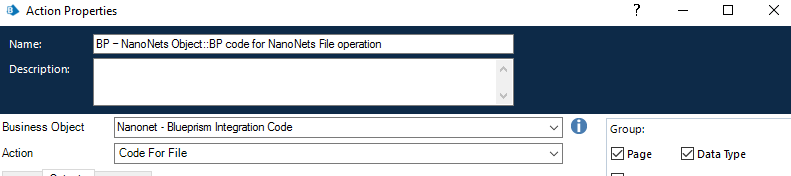
Drag One action stage and select “BP – NanoNets Object” in business object and call “BP code for NanoNets File operation” action.
● Get Model ID, API Key, File Location from NanoNets
You can use any of the trained OCR models from Nanonets APP and gather the Model ID, API Key. Below are more details for you to find them quickly.
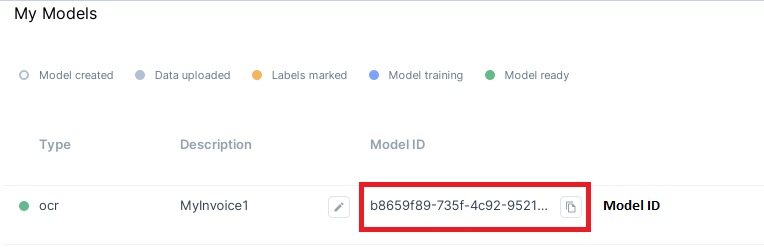
Model ID: Login to your Nanonets account and navigate to “My Models”. You can train a new model or copy the Application ID of an existing model.
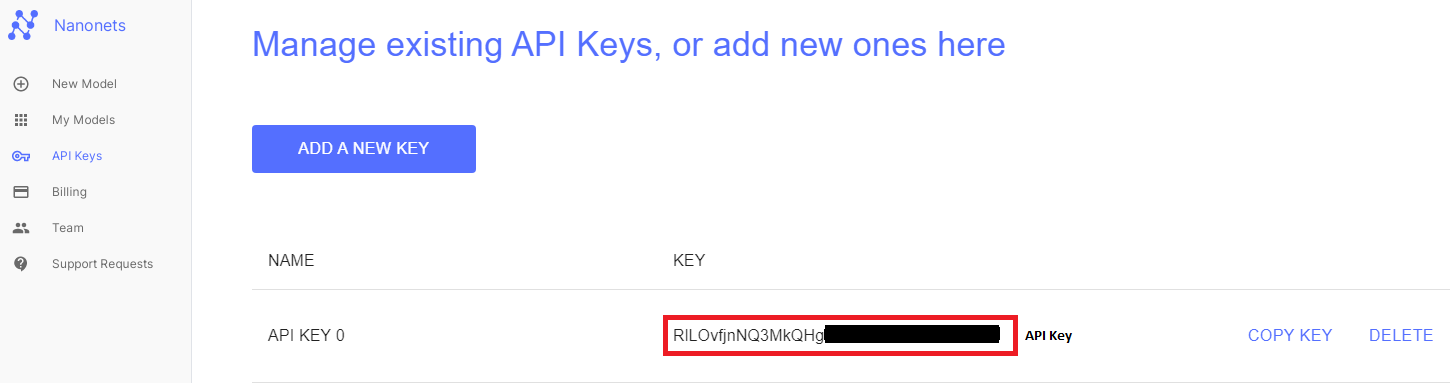
API Key: Navigate to the API Key tab, and you can copy any existing API Key or create a new one.
Copy the total file location for the input file.
● Set the input/ output for Calling action
Put all the necessary values in corresponding input fields and create output values.
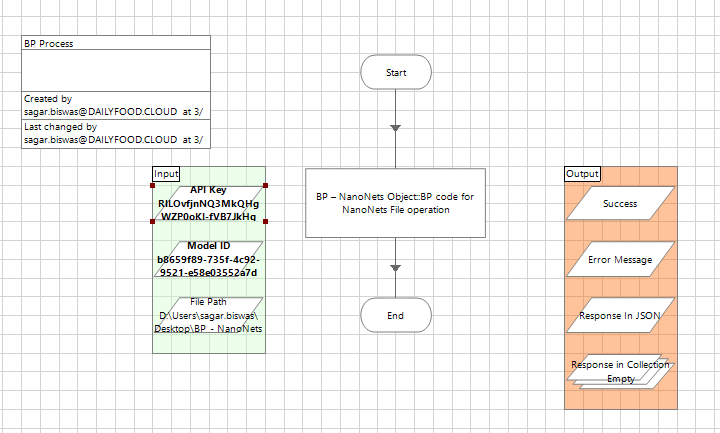
● Run the Code
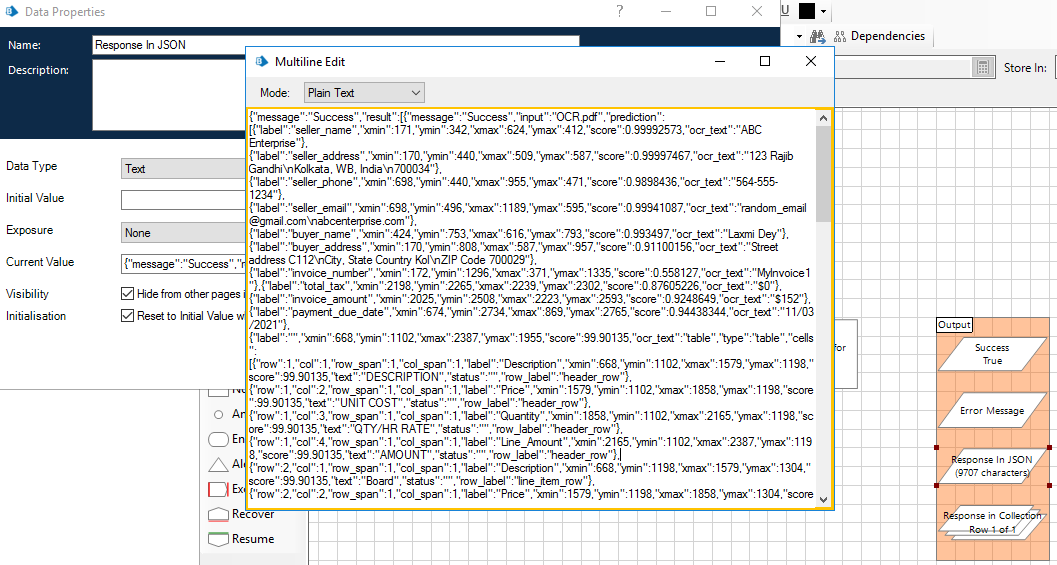
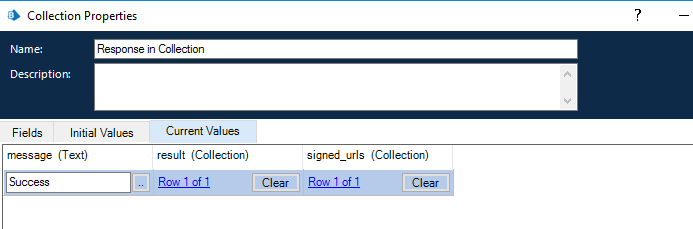
Once all inputs and outputs are set, save the code and hit the go button to run the code on your top navigation to predict your outputs. You will find the response is coming in two way. One in text format in “Response In JSON” test data Item and another in “Response In Collection” data collection.
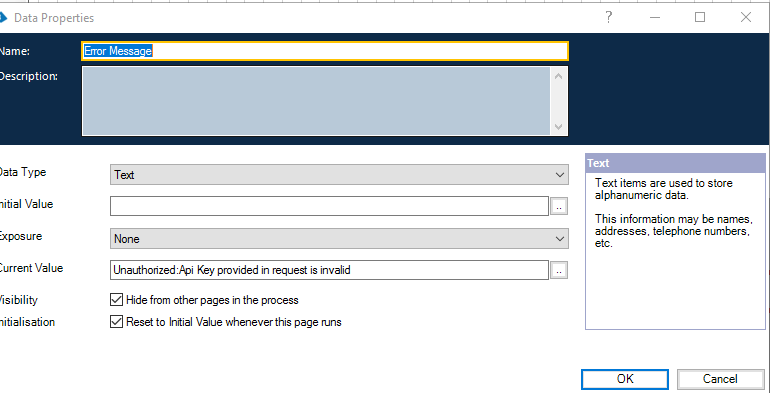
For any Error like wrong API key or Model ID bot will set the error message in “Error Message” data item. Below is the screenshot for wrong API error message.
To process more, you can simply add your file locations and run it accordingly.
Blue Prism – NanoNets Integration using Web URL
In BP-NanoNets Integration using web url the code will be almost same as BP-Nanonets Integration using File Input in above module. There are few parts which is not required here like check file path exist or not, set the file path.
● Initialize namespace, Language and DL
This step is same as the above module. Go to Object Initialize Page, open Properties, go to code option. Make sure you have all the DLL and Namespace mention as in the below screenshot. IF any DLL file is missing add in as an external reference. If any namespace is missing do the same. Make sure you have all the default DLL and RestSharp DLL is present in bp folder, else download it from internet and place it in BP folder (C:\Program Files\Blue Prism Limited\Blue Prism Automate) .Select the language as “C#”.
● Call the NanoNets API Code Stage
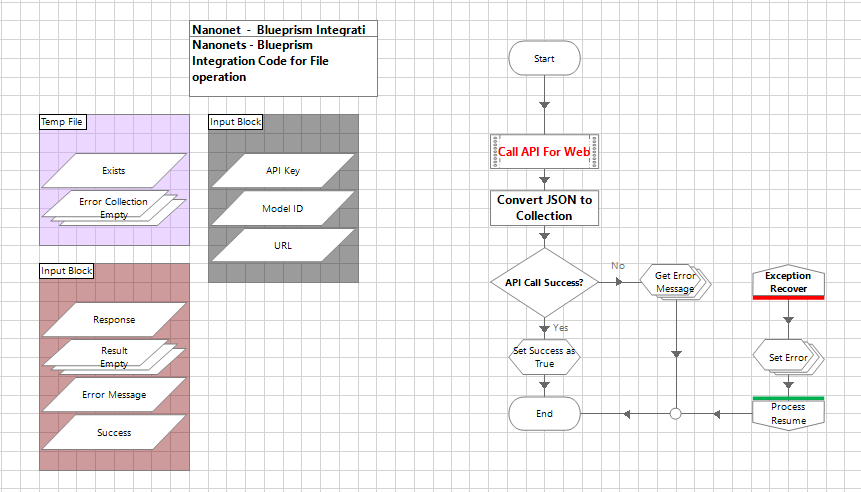
In API code stage input we need to pass the url for the web file instead of the windows file path we were providing in above module. Check the below screenshots.
Code:
string API = "https://app.nanonets.com/api/v2/OCR/Model/"+Model_ID+"/LabelFile/";
var client = new RestClient(API);
var request = new RestRequest(Method.POST);
request.AddHeader("authorization","Basic"+Convert.ToBase64String(Encoding.Default.GetBytes(API_KEY+":")));
request.AddHeader("accept", "application/x-www-form-urlencoded");
request.AddParameter("urls", URL);
IRestResponse response = client.Execute(request);
Response = response.Content;

Code stage output will be same.
Your total code should be like this.
● Run the Code
Once all the code is set, run the code and you will get the JSON response in two formats. One is in ‘Response’ data item with type as text and in result collection.